Tuesday 15 March 2016

Easy tool for creating word clouds- Wordle


Hello, everyone! How are you doing today?
These days I feel so great with the nicer weather! And, It’s almost end of term! J
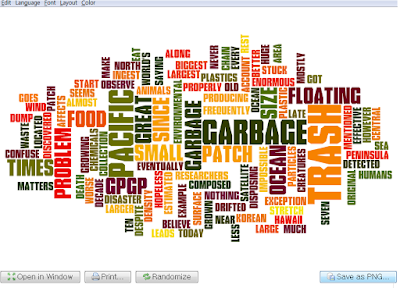
Today, I am going to introduce a free online word cloud creator. I bet you have seen word clouds or would know what word clouds mean if you see the picture below.

I found this quite useful as an English teaching tool, especially for vocabulary teaching. We will talk about its potential use later, after take a brief look at what word clouds are and how to use the tools.


What is word clouds?
“A visual representation of text data, typically used to depict keywords that appear more frequently in the source text.”
 
How to use Wordle?
It is very simple and easy! I am sure everyone can use this tool including even my mom! J
Go to the website: www.wordle.net
 
Can you see the "Creat your own?" then, click it to literally make your own word cloud.
If you see the blank squre like below, paste text, upload a document or open an URL to automatically generate a word cloud.

 
Customize your cloud with shapes, themes, colors and fonts. You can also edit the word list, cloud size and gap size.
 

How to use it as a teaching tool? (My personal ideas)

1. For a pre-reading activity (Having topic knowledge and priority vocabulary)

Before reading the text, show the word cloud to students to guess what they are going to read. Students can learn vocabulary that they are going to encounter in the text according to the importance(frequency). Have students focus on more frequent words to make a topic sentence. Especially, present them proper nouns such as GPGP in the text above, then let the student guess.

2. For a post-reading activity
 
After reading, show students the word cloud but remove some keywords so that students can fill out based on what they have read. Compare them with peers.  

 
3. Also, I think it would be so nice to use for
  • Comparing lexis in two or more texts with similar topics
  • Comparing lexis in formal and informal vocabulary if given spoken conversation and written communication over the same content
  • Categorizing lexical group and posting them in classrooms so that students can learn

As you can find out, Word clouds are attractive enough to get students attention because it does not look boring even though English vocabulary itself could be for some kids. Why don't you try by starting using it as a vocabulary list sheet?
Cheers.

Yuna :p

Monday 7 March 2016

Teaching asynchronomous speaking with Screencast-O-Matic


Hi, everyone!! How have you been doing?

In this posting, I would like to talk about teaching oral fluency with an asynchronomous speaking tool, Screencast-O-Matic.
 
Go to the website and download http://screencast-o-matic.com
 

I think I am not the only one struggling with teaching productive skills especially speaking with a lot of students in one classroom! I cannot give students equal chances to speak out in limited-time classroom and if I start to focus on group or student to give feedback, other kids just start to chat in Korean! :(

Problems with speaking in reality

l   Difficult to practice speaking in a meaningful and authentic way inside or outside class (Nakazawa, Muir & Dudley, 2007).
l   Difficulties in engaging introverted learners in classroom speaking activities          (Poza, 2011).  

ICT tools can help us with this practical problems in teaching speaking!
 
Even though there are some disadvantages of using CMC(computer-mediated communication) such as the absence of real human interaction, technical preparation and learning, etc, it allows learners to
l have more enough time to plan and check their language
l improve richer grammatical, lexical structures
l elicit more equal chance to speak especially to introverted, lower level students.

Thus, let's give a try with Screencast-O-Matic!! :)

Screencast-O-Matic is a simple, easy recording tool to create a video file using pictures and web camera or both. You can download it for free and the free trial offers maximum 15 mins recordings and three functions: recording screen, webcam, and both.

1. Sign up and main dashboard


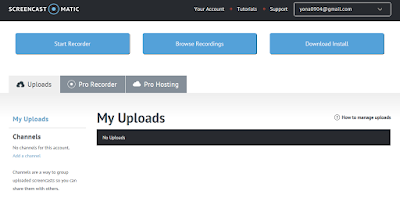
If you sign up and download the programme, you will see the main dashboard. You can also see the list of your work in your account.


2. Features


 With "Screen" botton, any pictures on your computuer screen is captured in the virtual square like above. Then if you finish selecting and adjusting the picture you want to use, press the read "Rec" to start recoding. With "Webcom," you also record your own video clip. Or using both pictures and webcom is also avaliable with"Both."


One thing I really like is scripted recording in pro features. To try that function you need to pay but It will be very useful to have students practice speaking and listening at the same time. Also, by watching peer videos with subtitles, linguistic mistakes or patterns can be more easily found out.
 

3. Trial

I tried recording a screen recording like below.
Once you finish recording, the file can be save in your computure or even you can upload it to YouTube right away. Here is my trial! As you can hear, outside noise should be controled when recording! >.<


**Use it Inside and outside classroom!...**
 
I believe Screencast-O-Matic can give students equal chances to speak in a more student centered way. It can be used to describe, present opinions, explain procedures with pictures about a particular topic given. Also, I think it can be a perfect tool to use as a post-reading activity such as retelling, summarizing texts students have read both individually or collaboratively.

Thank you, any comments and ideas are more than welecomed!
 

Wednesday 2 March 2016

Amazing Mobile Learning Tool- Nearpod


Hello, everyone. How are you doing? I feel it’s been a quite long time since the last posting. :P Today, I’d like to talk about M-learning and introduce an amazing app “Nearpod.”

I believe all you have some experience with mobile assisted learning or teaching. I very often online dictionary and podcast through my phone for my own learning. You will undoubtedly agree that M-learning (learning using personal electronics) allows distance learning, encouraging online interaction, access more authentic, richer learning materials and activities.  In Korean classrooms, it is not allowed for students to use wireless internet due to the difficulty of controlling imprudent use of it, but “Nearpod” is an app I’d definitely like to incorporate into my class but probably outside class time.


You can download the app through you mobile appstore or also use it on your laptop. With your Google account, you can easily sign up. One thing you have to make sure before you are going to bring it into your class is that everyone should have his own phone with the access of wireless internet.
  • Search and download “Nearpod” at the appstore
If you are in, you will see the main three taps on the top of right.
  • EXPLORE LESSONS
  • MY NEARPOD
  • JOIN SESSION


     1. EXPLORE LESSONS
Nearpod offers ready-to-use lessons you can just download and use. There are hundreds of different subjects lessons available from math to social studies. All lessons show you for what grade the lesson is for, so it is not so difficult to find suitable lessons for your leaners. But most of them you need to pay around £3-4.

      2. MY NEARPOD
Now, it’s time to create your own mobile learning. With this platform, you can create new slides or easily turn your Powerpoint, Google Slides, or PDFs into an interactive Nearpod presentation.
 
If you click “New Presentation” as bellows, you can add your slides just like using PowerPoint. Not only the content with your own words, but also content from web, Twitter, videos, Nearpod can added to create a lesson. Furthermore, you can also add activities your leaners actually can do while learning such as quizzes, drawing, poll, open-ended questions. It means Nearpod is not just a medium for conveying information one-way, but an interactive learning tool.
Basic platform

Activity platform
 
I tried making a class for “Asian culture” using slides and the functions such as Field Trip and Quiz making. 
Now you can see there is my Asian culture class made in my library(my nearpod).
    3. JOIN SESSION
 
Click “Live session” then you will be given the pin number which should be provided to your students to join this class. All your leaners have to do to join this virtual classroom is download the app and enter the pin number into “JOIN SESSION.”


If everyone is in (you can also see who’s in or not once you start the session), you need to control the presentation in order not to go too fast or slow considering your students.
One really good feature is that you can get immediate feedback on how your learners are doing. For example, when learners are given some questions as review on the lesson, they answer the questions and send them. Then, you can check how they did right away. It would be really nice especially in terms of open-ended questions since everyone in the session can share theirs to each other.
It seemed quite innovative to me because it implies that learning and teaching can happen anywhere just with a phone. We cannot even complain the quality of teaching. As you can see Nearpod does offer rich recourse teachers make use of. Some might worry if leaners can more easily get distracted using their phone, but we need to have a think about the advantages of learning in action. If my classroom is allowed to have wireless internet, I would try the lesson using this app, especially when my leaners seem too bored with traditional communication in classroom.